Friday, December 26, 2014

Happy Birthday to Me Blog Hop


Happy Saturday
and
Welcome to...
My Birthday Celebration!
 
This year I wanted to celebrate my Birthday by sharing a blog hop with you that has some of the best crafters I know.
So, be sure to hop through everyone's blog to see all of the amazing projects that they have made to share with you today.
And don't forget to leave everyone a little bloggie love for your chance at winning some blog candy to give to one lucky person.
Not only am I getting presents today but someone else will as well.  
 
Today's blog candy is the Project Life Theme Kit, Celebrate.
 
 
Now, are you ready to see some amazing projects...
So, sit back, grab yourself a latte, and hop along with us as we celebrate my birthday.
 For my Project today I created a few things for a fun Birthday gift.
The first is a fun treat box... It is a Gable box with a cupcake accent and matching tag. The file is from Creativekuts.com

Easy Bake Ultimate Oven

 I Bought an Easy Bake Oven for my Granddaughter last year so this year I thought it would be fun to make her some homemade mixes for it because the store mixes are very expensive.  After scouring Pinterest and comparing all of the different ideas they had there I came up with this simple recipe by combining several of their ideas together to make her plenty of fun mixes.

I printed out my recipe for her Mom to make her new mixes cheap and easy whenever needed
I added the mix to 10 Baggies after mixing 1/2 with one flavor and 1/2 with the other
I designed some cute toppers on my computer with the name and some cute images for the top label, then I put the instructions on the back that I flipped the text upside down so when they were cut and folded it would be facing the right way.  I then cut them out with my biggest Spellbinder's Label 10 die
I scored a line down the center of each first so I could line up the die easier
I Love How they turned out :)
I got a Monster High Reusable Bag to put everything in to make it her own little Easy Bake Baking kit.  I added 2 tubs of frosting, all 10 of these Mixes plus the recipe card.  I plan on picking up a whisk and some measuring spoons to throw in there too.  I will add an image of the entire kit if I get that done today :)
 
Thank you for stopping by and visiting with us today and helping me to celebrate Robin's birthday.
Your next stop will be with...

Amy E. - http://www.scrapthissavethat.com/

And don't forget to leave everyone some love on their blogs for your chance to win the Project Life Celebrate Theme Kit. 

Here is the line-up for todays hop in case you get lost along the way...

1.  Robin - http://create-a-latte.blogspot.com/


Thanks so much for stopping by, I hope you enjoyed my project.  Please leave me a comment letting me know. 
 
Happy Crafting ~ Eva Scraps
 

Monday, December 8, 2014

Christmas Word Art Tags

I love making hand made tags for gifts :)  these 3 are almost the same.
 

I used a tag from Cricut Very Merry Tags for my base that I stretched to the size I wanted to fit my stamp good.  I then ran it through my Cuttlebug Snowflakes folder and rubbed a light blue ink over it and also inked the edges with same ink.  I also made a topper for each tag cut from some beautiful Blue Iridescent paper (LOVE) I also inked the edges with a darker blue ink.  I used Craftin Desert Divas Simply Holidays Wordart stamp Set for the awesome sentiment.  I First used the free svg file Tara gives with lots of her stamp sets, then I stamped in Black Staz-on ink ...I planned to water color, but changed my mind.  I inked the edges with a darker blue ink.  I then popped it up on foam tap and attached to the tag.  On the tag topper I added some beautiful snowflake swirls cut from a Monster aluminum can using the beautiful snowflake border die from my craft spot.  I snipped of the sections I wanted simply with my scissors and used hot glue to attach.  I added a light blue grosgrain ribbon through the hole in each tag and used a regular stapler to attach it in place.  I then cut a snowflake from one on my www.creativekuts.com files and used some cute face stamps from Peachy Keen - Everyday Character assortment (PK-490)  I used 3 different adorable faces all 1/2" in size.  I used white gel pen for the eyes and some pink chalk for the cheeks.  I used hot glue again to attach these snowflakes to the ribbon hiding the staple.

I am entering in these fun challenges:
Cardz TV - #5 "TAG...YOU'RE IT!"  (3 Tags)
My Craft Spot - #160 - Sentiment as the Focal Point
DL.Art - December Linky Challenge "Anything Goes"
Craftin Desert Divas Craft it up Link it up Party - Christmas


Well that is it for me today, this being my second post in one day lol.  Please leave a comment and have a fun and crafty day ~ Eva Scraps

Penguin Candy Bar Wrapper

The file for this adorable Penguin Candy Bar Wrapper is from Cheryl over at CreativeKuts.com
I used Black heavy card stock for the body/wrapper and flippers.  Some white and orange card stock for the face and some white gel pen doodling.  I used some fun Christmas circles pattern paper for the scarf.  The ornament is an upcycle from a beautiful shiny red Gift bag that has embossed swirls and Merry Christmas on it... the ornament topper is another upcycle  cut from a cleaned Splenda sweetener Bag using the shiny inside which I ran through Cuttlebug folder.  The star is cut from a yellow glitter paper and the adorable Merry Christmas Stamp at the bottom is from Craftin Desert Diva's "Happy Celebrations" Set which I heat embossed with white embossing powder.  Oh yeah and it holds a standard size Hershey's Bar inside :)

I am entering into these fun challenges:
Craftin Desert Diva's - Christmas Linky Party
DL.ART - Thankful Thursday Any Winter Holiday

I hope you enjoyed my project today, thanks for stopping by... don't forget to leave me a comment, I love reading those :) 
Happy Crafting ~ Eva Scraps

Sunday, December 7, 2014

Star Masuline Birthday Card

 
Using some Brown Card stock as my base I layered some pattern paper ful of small green stars that I ran through my Cuttlebug Simply charmed set -squares.  I added two double layered square panels with the top in Kraft Card stock that I ran through my CB Stars folder.  Then I added a double layer Oval with green dotted paper on top that is popped up on foam squares.  I cut 3 different sized stars from Cricut County fair cart the big one is in a wood look paper the bottom 2 are popped up on foam... one of them in a green pattern paper and one in Kraft card stock that I again ran through my stars CB folder.  I used some puffy paint for the dot accents at each corner.  The adorable Happy Birthday Stamp is from Craftin Desert Diva's - "Happy Celebrations"
 
 
The inside I used some of the matching paper to accent at the top and used several different stamps from my stash I love all of these fun different star stamps.
 
I also cut a box to hold the gift using an SVG from Heather I think.  and I cut a tag from Very Merry Tags making a second top layer that I cut out a star and slipped some of the same matching pattern paper under to bring it all together.  Same cute stamp "Happy Birthday" from CDD.  I dotted and dashed around the star with Green and white gel pen.
 
I am entering my project in these fun challenges:
 
Thanks so much for stopping by today, hope you liked my project. ~ Eva Scraps

Wednesday, December 3, 2014

Penguin Shaker Tag/Ornament

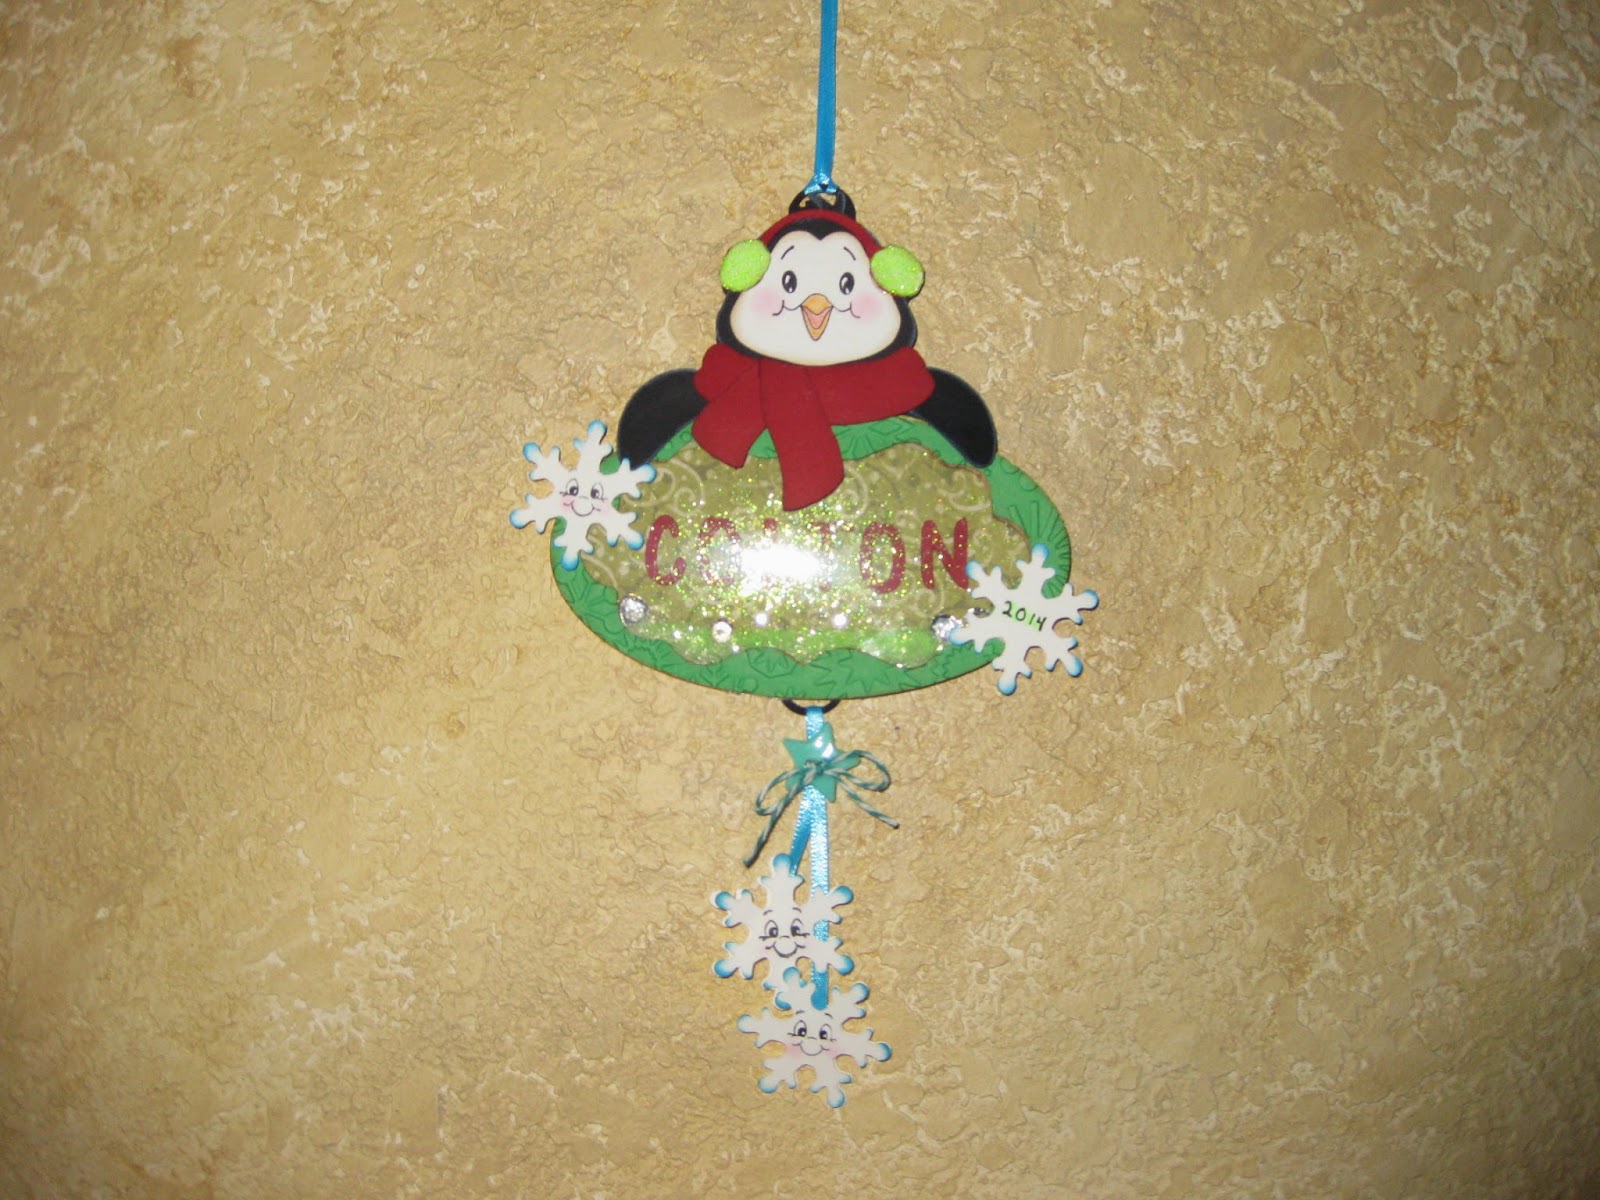
I made this adorable Penguin Shaker Ornament from Created Kuts which can also be used as a tag.  I decided to add the name of my Grandson instead of the adorable original way with the word believe.  This is my very first shaker project of any sort, it was easy and fun.


I used some adorable Peachy Keen Faces for not only the adorable penguin which I used PK-521 Winter Faces 1 1/8" that I colored in and chalked the cheeks  but also PK-490 1/2" everyday character faces for the snowflakes X 3 with cheeks again chalked and white gel pen for eyes.  I inked all of the snowflakes with some cats eye blue ink. The 4th snowflake I used my Cri-Kits green gel pen to write out 2014... it wasn't showing up enough so I went back over it in black gel pen by hand.  Also on the penguin... I added green glitter to the ear muffs.  Inside the shaker I add chunky white glitter with a few sequins scattered through and a touch of the fine green glitter that I used on ear muffs.  I embossed green frame with my Cuttlebug Snowflakes folder.  I used some 1/8" Blue Offray ribbon for the hanger and I also strung some through the bottom and attached a back snowflake then foam tape, then ribbon end then another piece of foam tape then the snowflake with the adorable PK face showing for both ribbon ends.  I then took a Blue star button and threaded a piece green and white bakers twine through the button attaching and tying it to the blue offray ribbon.

I am entering in these fun challenges:
Simon Says Stamp - Christmas/Holidays
Hiding in my Craft Room - #176 Freestyle
Little Scrap Pieces - Show it Off Saturday Linky Party
Craftin Desert Diva's - #45 Christmas Linky Party 12/21
DL.ART - December Linky Party - Anything Goes


For my very first shaker project... I am impressed and plan to make more in a different style for the other 2 kids.